Manage basic system configurations.
Designing Theme
- Log in to supOS, and then click
 at the upper-right corner to enter the design center.
 - Select System Configuration > System Settings > Theme.
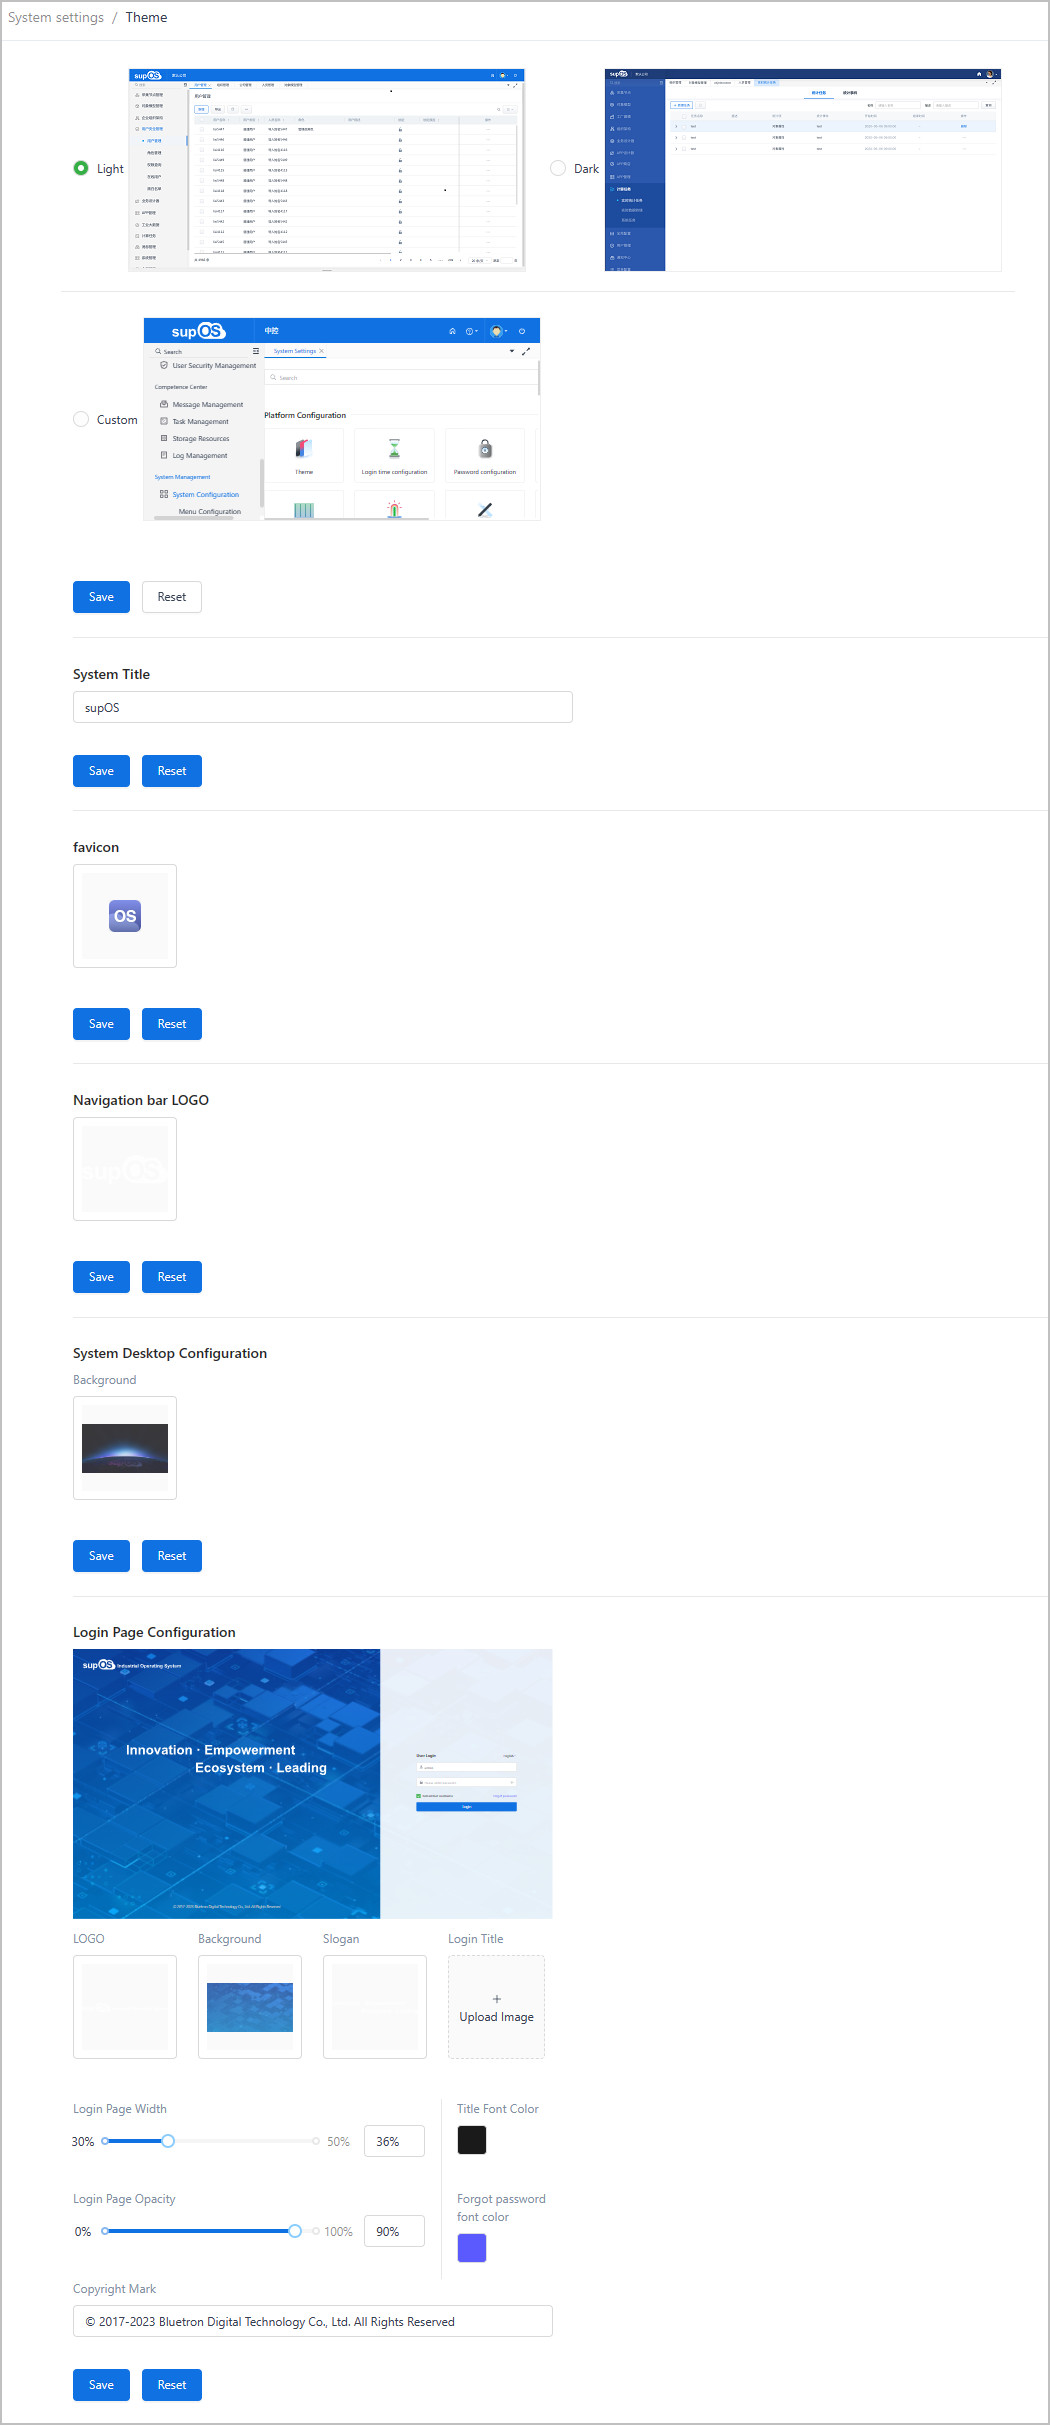
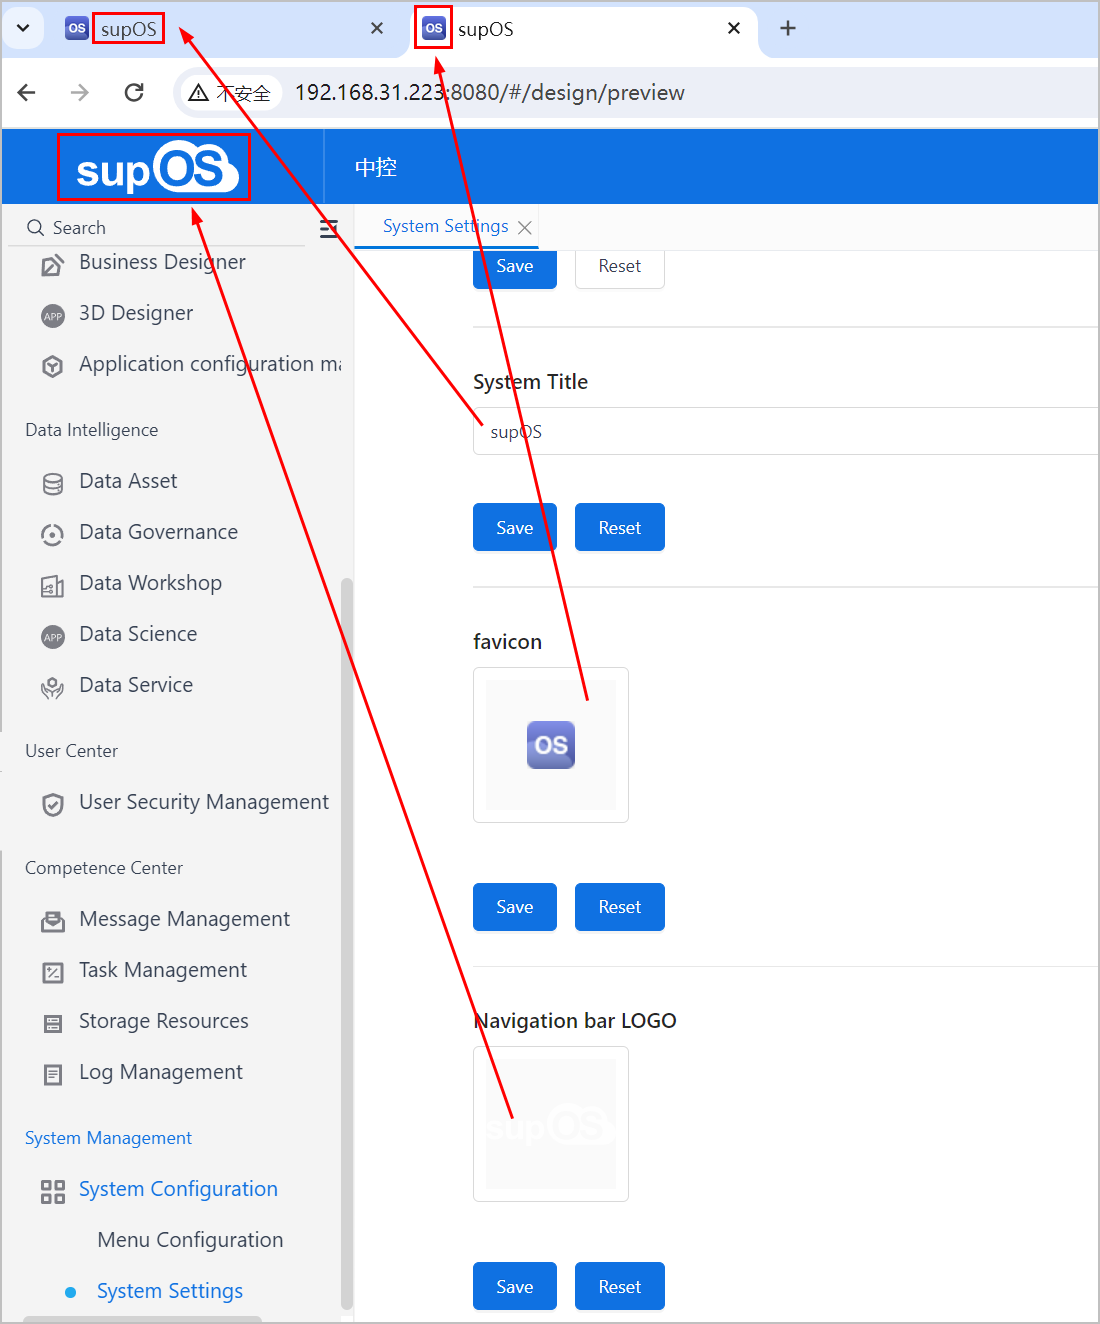
- System Title: Set the title of supOS.
- The title is displayed on the browser tab when in the operation center and design center.
- APP title-system title is displayed as the page name of the low-code application.
- Task status_task name (process name)-system title is displayed as the name of task details page.
- Favicon: Icon displays on the right side of the System Title.
- Navigation bar LOGO: Set the logo of supOS. The recommended and minimum image size is 110 × 36.
- System Desktop Configuration: Select an background image for the default homepage that is configured in Setting Default Home Page.
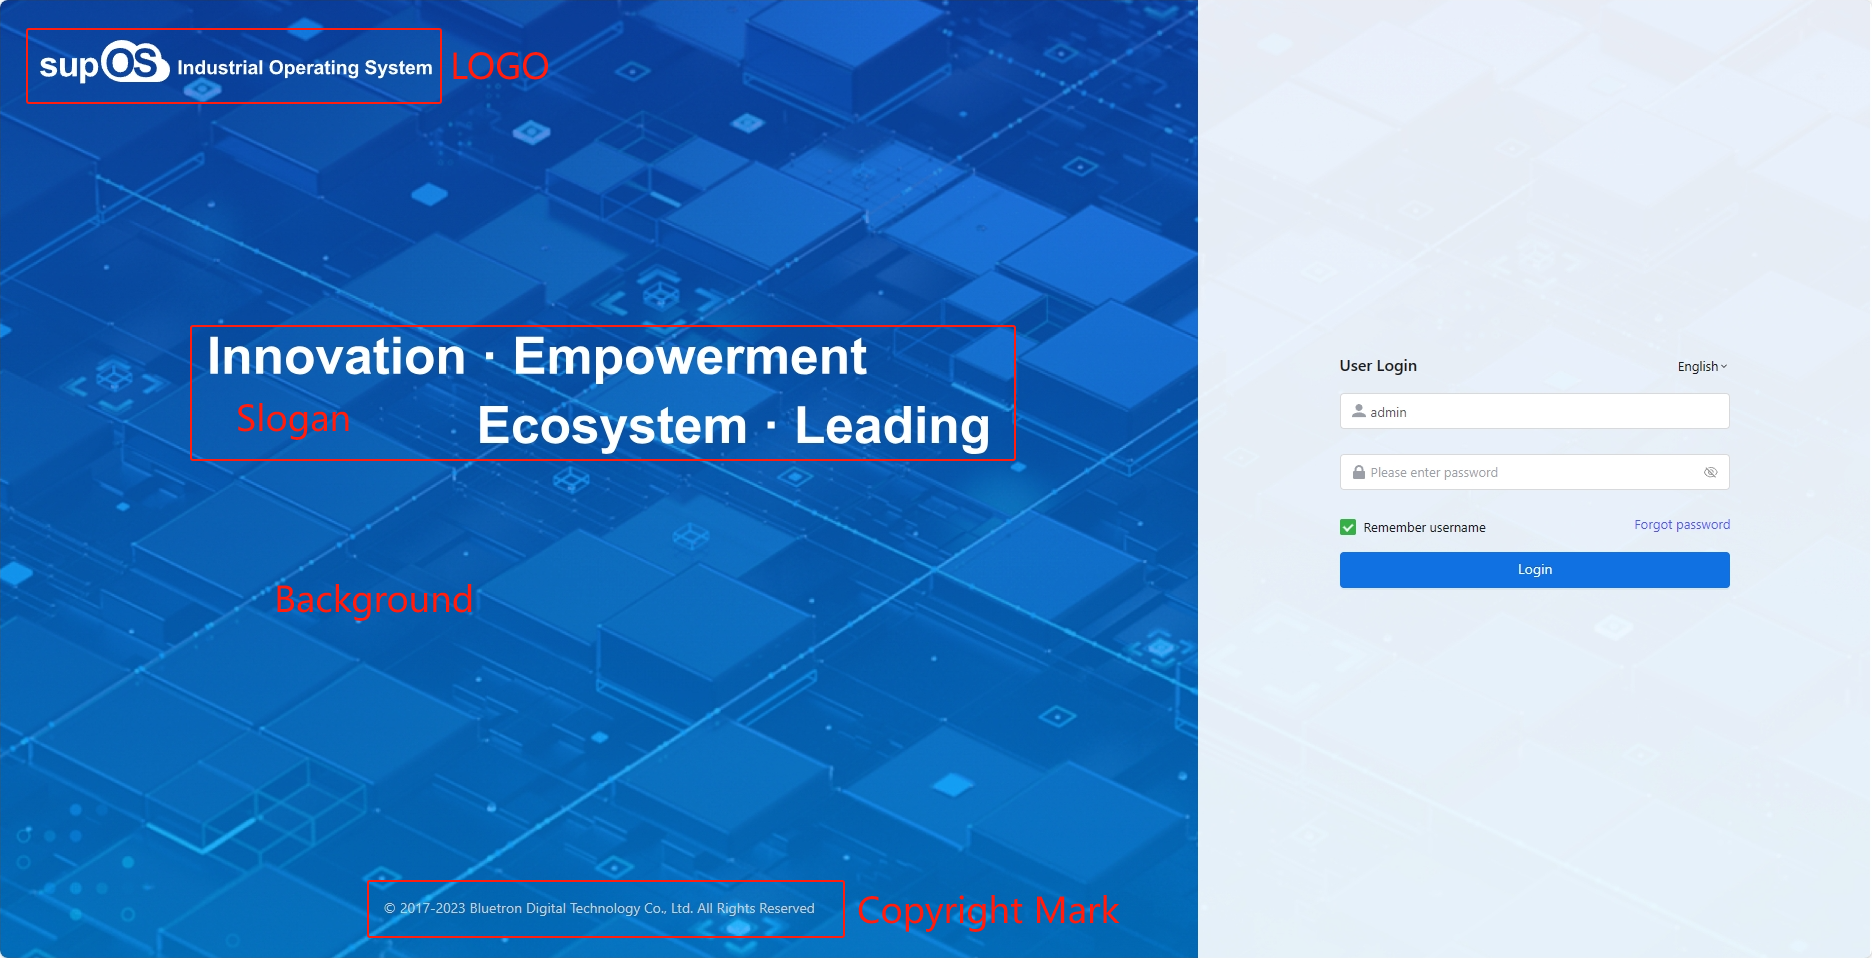
- Login Page Configuration: Set the copyright, logo, background, slogan and login title (image) of the login page.
Setting Login Time
- Select System Configuration > System Settings > Login time configuration.
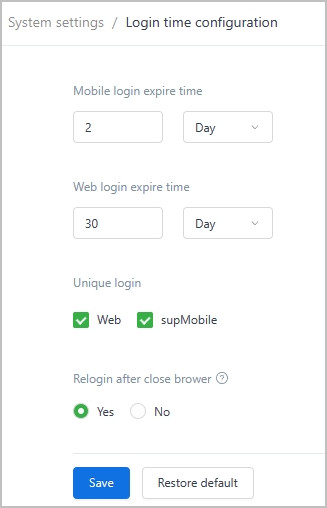
- Login expire time: When supOS on web browser or mobile clients stays inactive for a period of time that exceeds the set duration, you need to log in again.
- The login expiration settings take effect upon second login.
- You can set the platform to stay active on the APP setting page.
- Unique login: You can only log in to supOS on one browser or start one session on supMobile at the same time when it is enabled.
- It is recommended to enable unique login to save online user quota.
- The unique login does not apply to admin.
- Relogin after close browser: Click yes to enable request of relogin after closing browser.
When using Safari, close the browser by clicking the exit button.
- Click Save.
Setting Password
- Select System Configuration > System Settings > Password configuration.
- Configure password related settings.

| Parameter | Description |
|---|---|
| Password policy | Set the password length and types of characters contained. |
| Password lifetime | Whether to enable request for password update in the set cycle. |
| Password lock | Lock the account for a certain period of time when the number of wrong attempts exceeds the set value. |
| Verification Code | Whether to enable request for graphic verification code when wrong attempts exceeds the set value. |
| Forgot Password | Whether to enable sending temporary password to the set email when forgot password. |
| View password plaintext | Whether to allow view the password plaintext. |
| Enable two-step verification | Whether to require a verification code after entering password when logging in. info Make sure the sender information is configured under Message Managemeny > Message Configuration. |
| Other |
|
Setting Default Home Page
- Select System Configuration > System Settings > Default home page configuration.
- Select a page to be the homepage of supOS. Select Show Navigation, and the function list is displayed on the left side of the homepage.
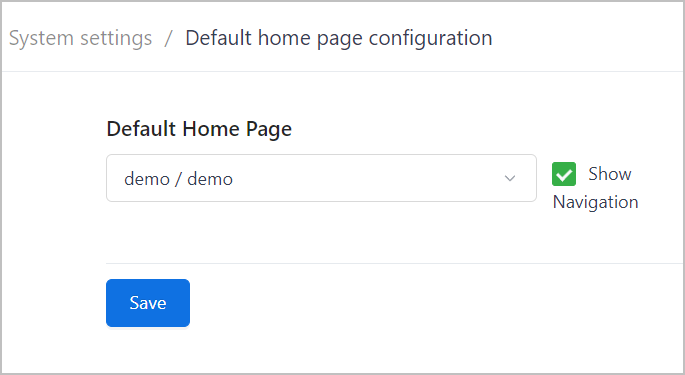
When selecting Desktop System > Default Desktop, the background set in System Desktop Configuration is displayed. For details, see Overview.
- Click Save.
You can customize the homepage when you select the default desktop.
Setting International Management
You can add UI strings and corresponding translations to sopOS to switch the platform language display.
Presently, supOS only supports simplified Chinese, traditional Chinese, English, Indonesian and German.
- Select System Configuration > System Settings > International Management, and then click Language Settings.

- Enable languages you need, and then click OK.
The enabled languages are displayed on the login page for selection.
- Click New, and then enter the UI string you want to add along with its location, key and translations for enabled languages.
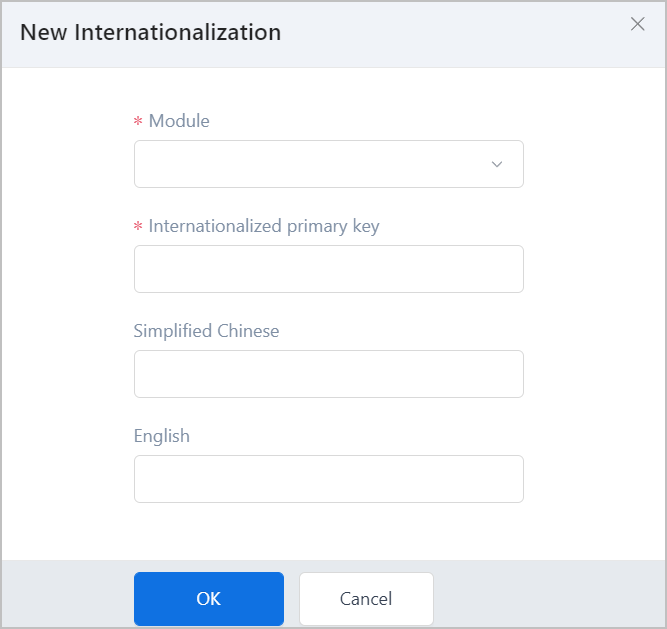
- Click OK and the string is added.
- Click
 , and use the template to batch import strings.
 - Click Export, and then change the exported file and import again to update the current translation.
Managing System Code
You can set standard options for drop-down lists and use them in Business Designer during application development.
Presently, the system code can only be used through openAPI.
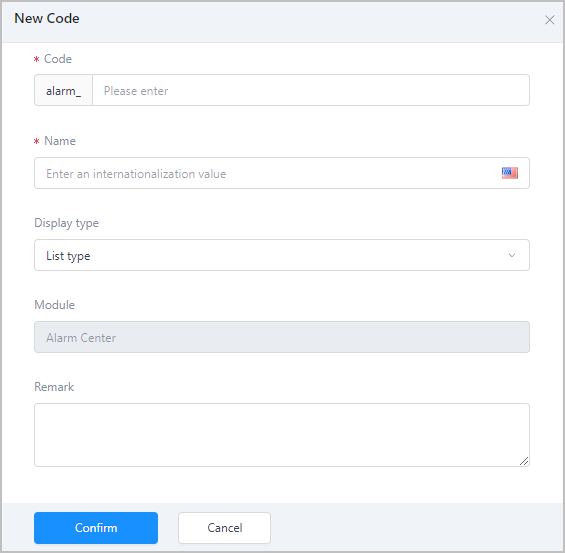
- Select System Configuration > System Settings > System Code, and then select a module from the left side to which the system code belongs.
- Click New, enter the code, name and display type of the option, and then click Confirm.
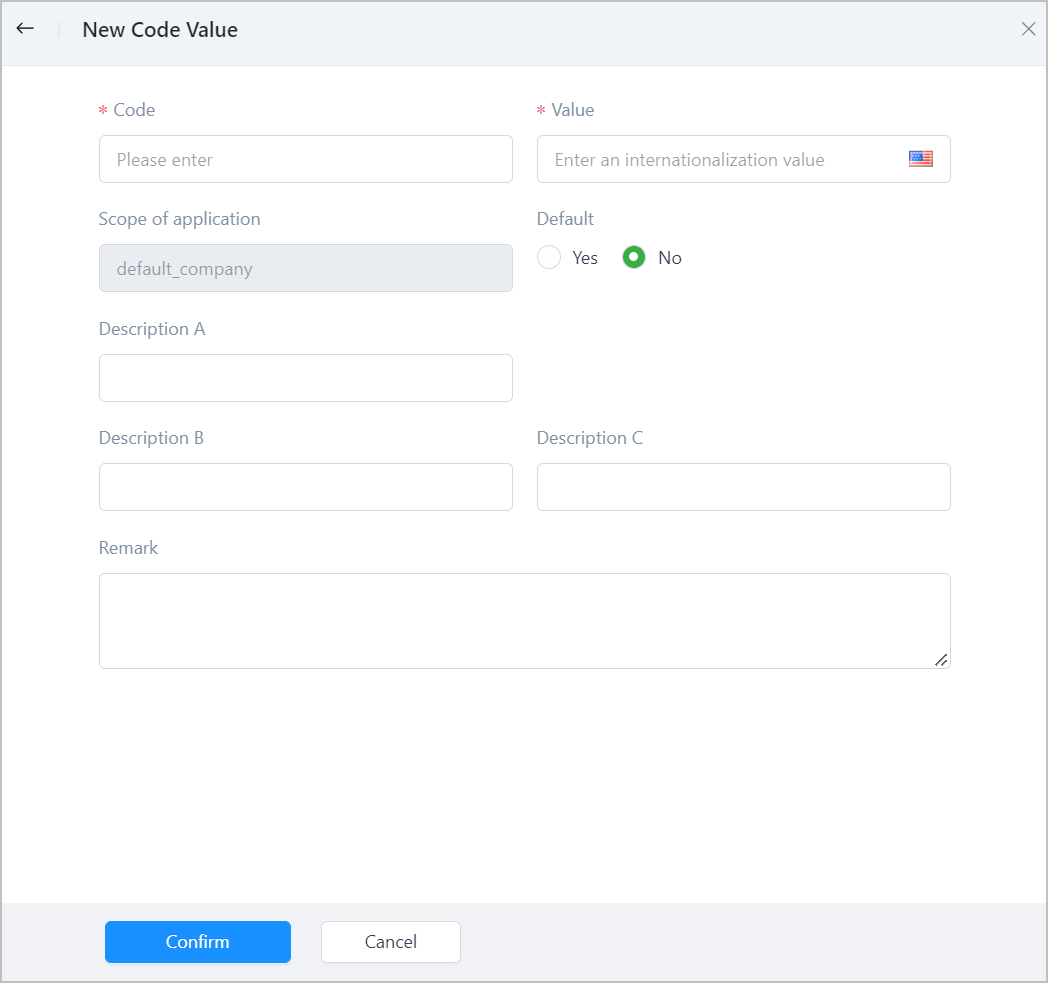
- Hover over the added code, and then click Code Value Management under Operation.
- Click New in the pop-up window and add options to the system code, and then click Confirm.
- Code/Value: Option code and text.
- Scope of application:
| Parameter | Description |
|---|---|
| Code/Value | Option code and text. |
| Scope of application | The application range of the option. You can adjust whether to enable it by clicking the icon next to title System Code on top. |
| Default | Whether to set the current option to be the default. |
| Description/Remark | Notes about the option. |
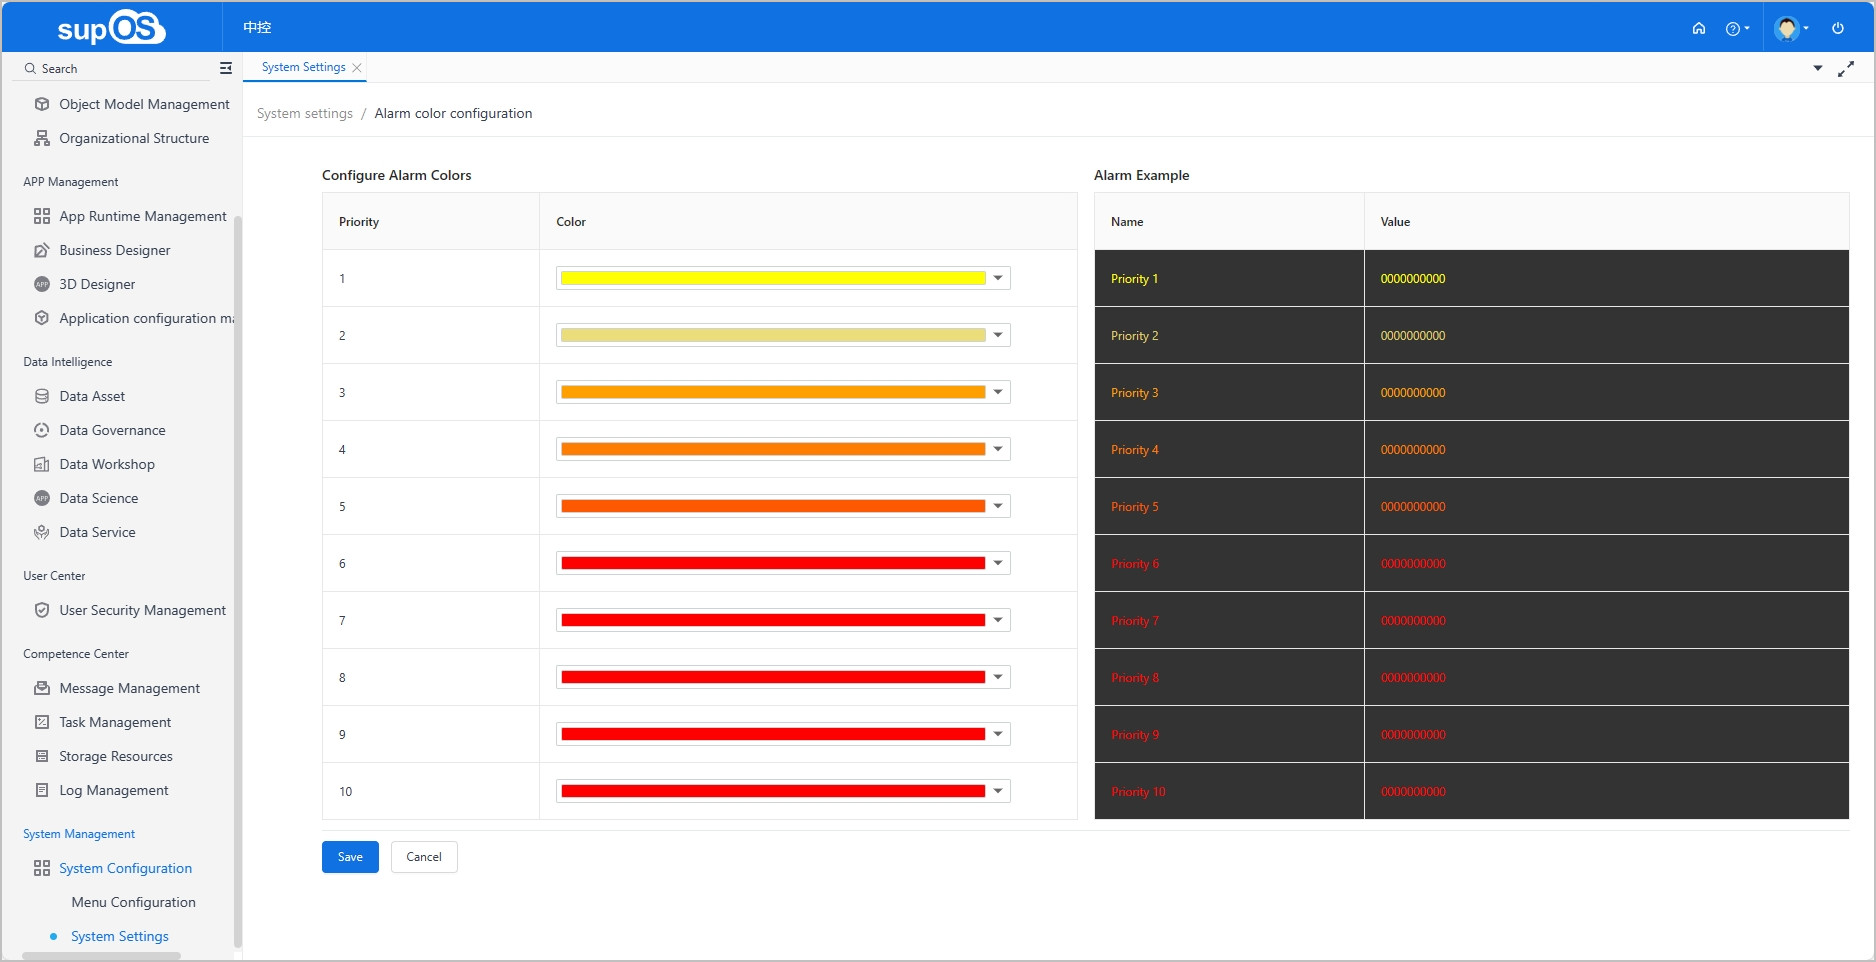
Setting Alarm Color
- Select System Configuration > System Settings > Alarm color configuration.
- Set the alarm color based on the alarm level. supOS supports up to 10 levels with 1 as the lowest.
- Click Save.
Configuring Business Designer
- Select System Configuration > System Settings > Business designer configuration.
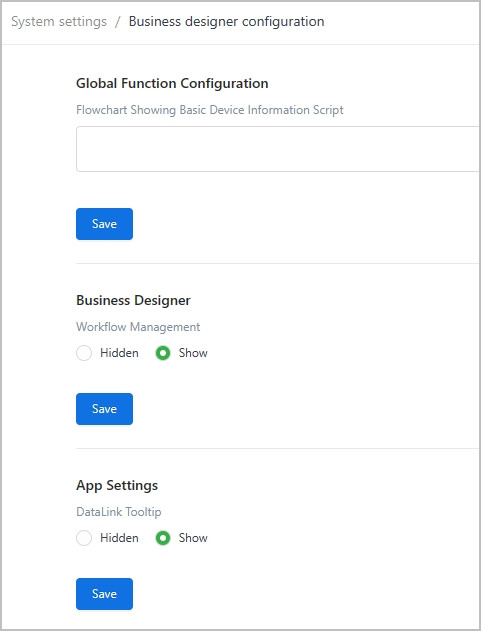
- Global Function Configuration: Set the global function that automatically runs when the supOS backend service is started.
- window.SUPOS.registerSuposFn function: Obtains the methods of the global function definition.
- Once the supOS backend service starts, the onReady method of the global function will be automatically called, and then you can define specific functions. For example:
var f1 = function()
var onReady = function()
console.log('This method will be automatically called once supOS starts')
return f1,
onReady
- Business Designer: Display or hide the Workflow Management menu in the business designer. We recommend to hide it for servers with low resources.
- App Settings: Set whether to display the DataLink Tooltip along with the collected data when running the APP.
Configuring Log Policy
Various logs build up with the use of supOS, set a strategy to clean the log data for releasing storage space and improving the platform performance.
- Select System Configuration > System Settings > Log policy configuration.
- Set the strategy for each type of logs.
- The logs can be kept for up to 7300 days.
- 10 million pieces of logs can be saved at most.
- Set the time for clearing log data separately to prevent server from overloading.
supOS keeps all logs permanently by default.
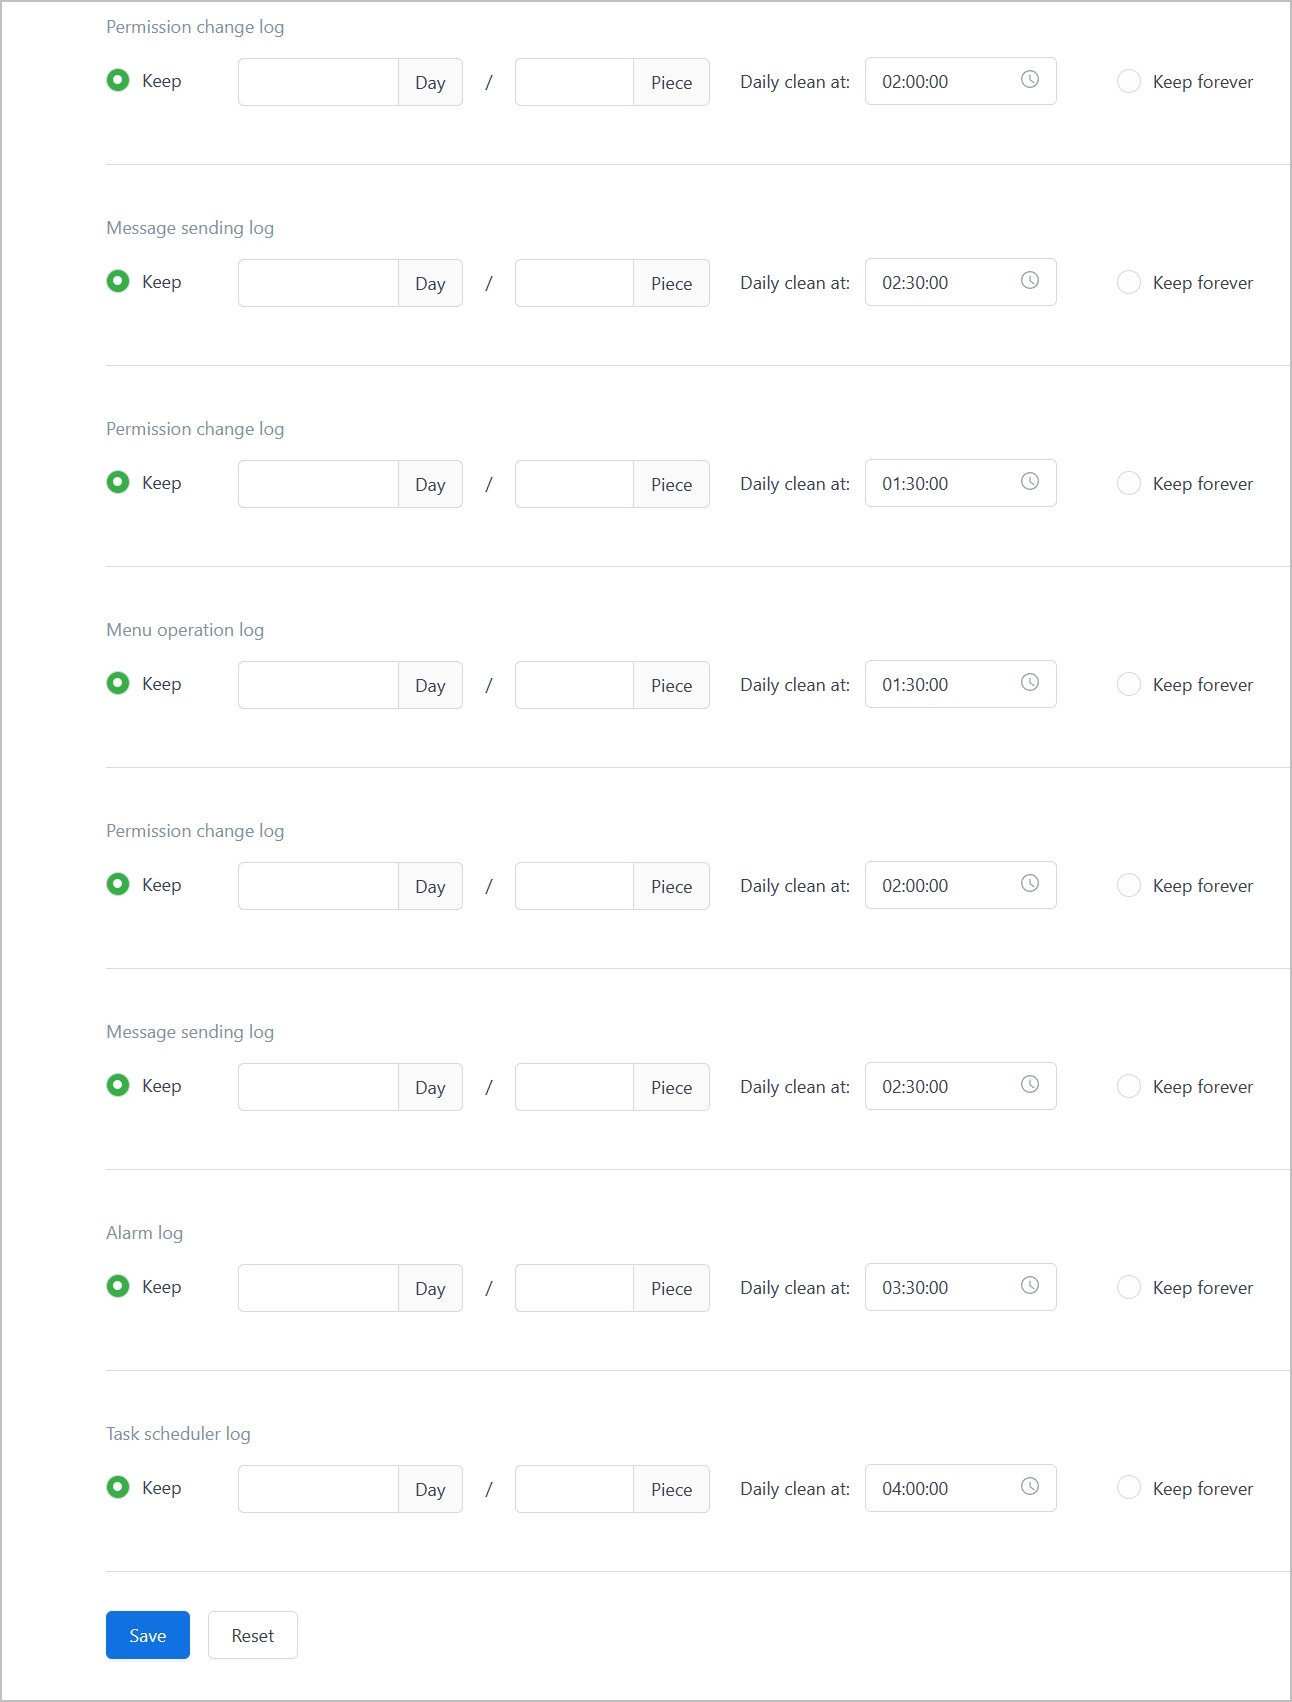
- Click Save.
supOS clears the earliest log data when the set limit is reached.
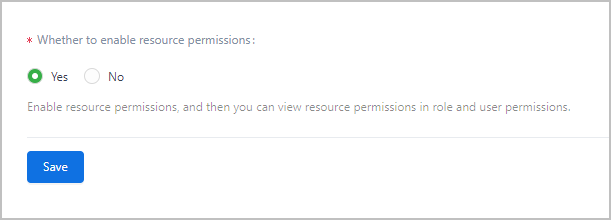
Configuring Resource Permission
Set whether to display Resource permissions when granting permissions.
- Select System Configuration > System Settings > Resource permission config.
- Select whether to enable resource permission display.
- Click Save.
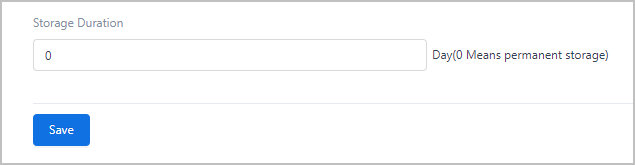
Managing Time Series Data Storage
Set the storage duration of the time series data history. When the duration exceeds the set value, the platform deletes the earliest data and keep the latest.
- Select System Configuration > System Settings > Time series data storage policy.
- Set the duration, and then click Save.
- The default duration is one day. 0 means permanent storage.
- 7 GB of space is needed to store 10,000 points of data that changes by the second.
Setting Allowlist and Blocklist
Set the allowlist and blocklist to control platform access. IPs on the blocklist cannot access supOS.
- Select System Configuration > System Settings > Allowlist & Blocklist.
- Click the upper tab Allowlist, click New, and then enter IP to add new. Wildcard characters are available.
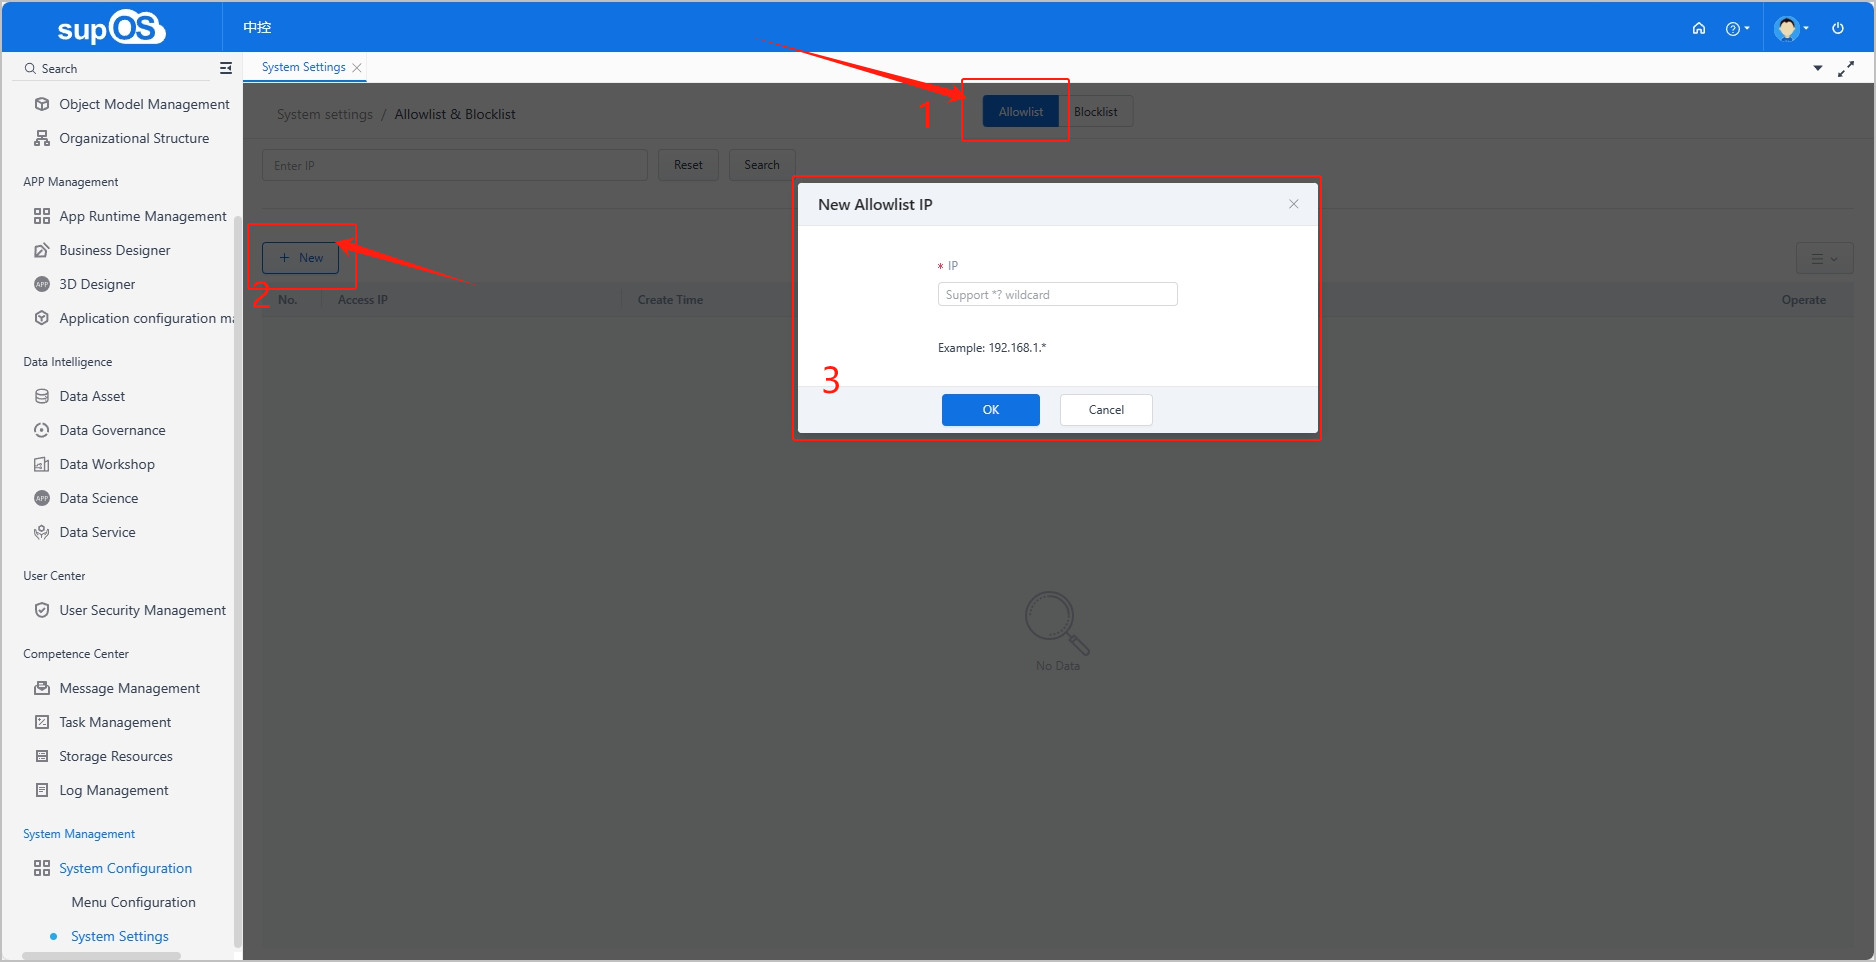
- Add the current IP to the list first. Otherwise it will be forced to log out.
- Blacklist works the similar way.
Fuzzy match is available when searching for IPs.
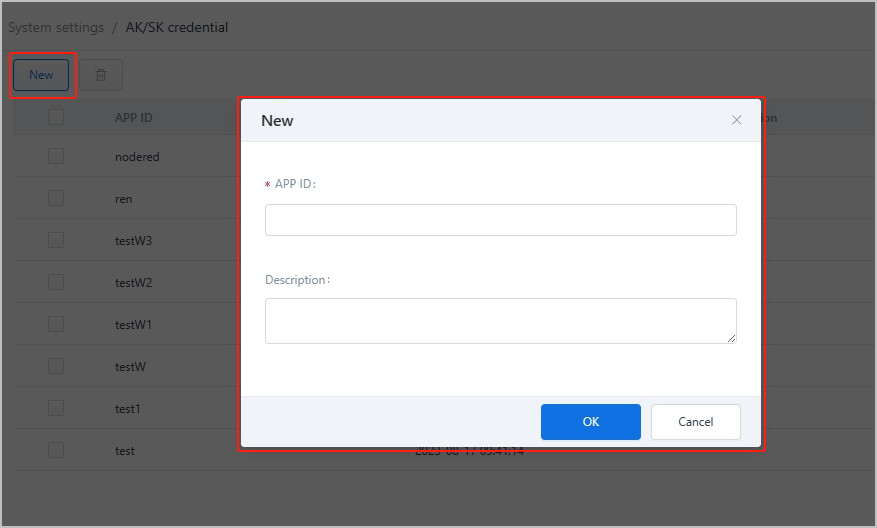
Managing AK/SK Authentication
Third parties can access supOS and obtain specified data through openAPI with AK/SK key as auhthorization.
- Select System Configuration > System Settings > AK/SK credential, and then click New.
- Enter the information and then click OK.info
The AK/SK file is automatically downloaded.
Managing Basic Image
When the basic image file does not meet the requirements of APP development, you can upload the needed image file.
- Select System Configuration > System Settings > Basic Image Management, and then click New.
- Click Upload to select the image file, enter the file name and version, and then click OK.

The file extension name must be .tar.
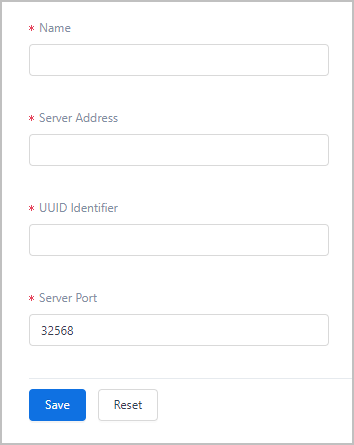
Editing Cascading Setup
Connect the data of supOS A to the current supOS B.
Add a GRPC connector under Collection Node Management > Authentication on supOS B, and obtain the node name and UUID.
- Select System Management > System Configuration > System Settings > Cascading Setup on supOS A.
- Enter the node name, UUID and supOS B address.
- Leave the port as default, and then click Save.
- Select Collection Node Management > Status, and authorize the connection.
- Select Object Model Management > Object Instance > Collector Template, and check the instance generated from the connection.
Controlling Internet Access
Set whether to allow Internet access to upOS.
- Select System Management > System Configuration > Internet access control.
- Click Open, and Internet access is disabled.
Use together with the Internet marking service.
Setting Safety Protection
- Select System Management > System Configuration > Safety protection.
- Click Open to enable XSS attack protection and Path leakage protection.
- Click Save.

Enabing Parallelultravires
Prevent unauthorized users from accessing supOS pages through entering the original URL in the browser and bypassing permissions.
- Select System Management > System Configuration > Parallelultravires configuration.
- Click Open.
- Click Save.